Gmail Two Factor Authentication Configuration Guide
A step by step guide to reconfiguring your Gmail account to Ricoh’s printers.
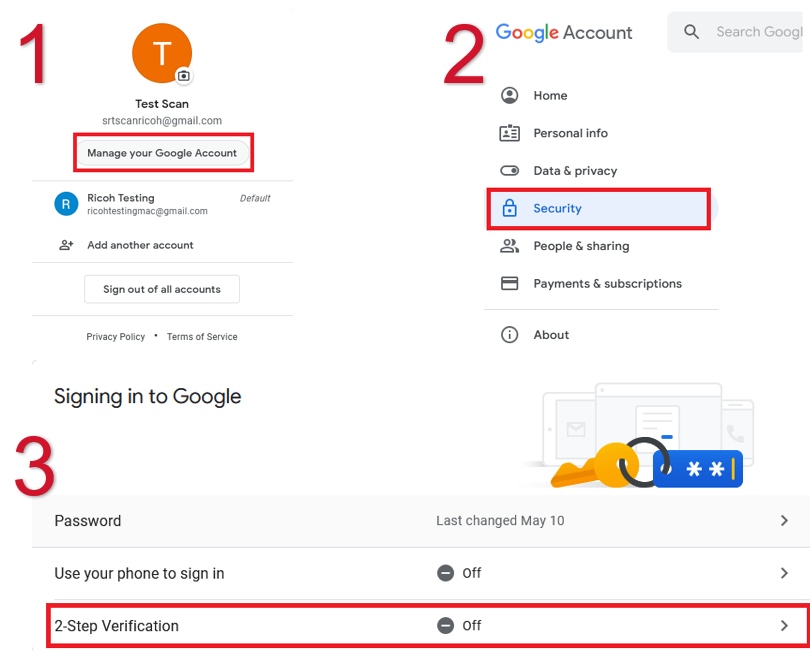
Configure 2-Step Verification
Configure for existing copier Gmail account (the email address the copier sends from)
1. Click on ‘Manage your Google Account’
2. Select the ‘Security’ option from the dropdown menu
3. Select ‘2-Step Verification’
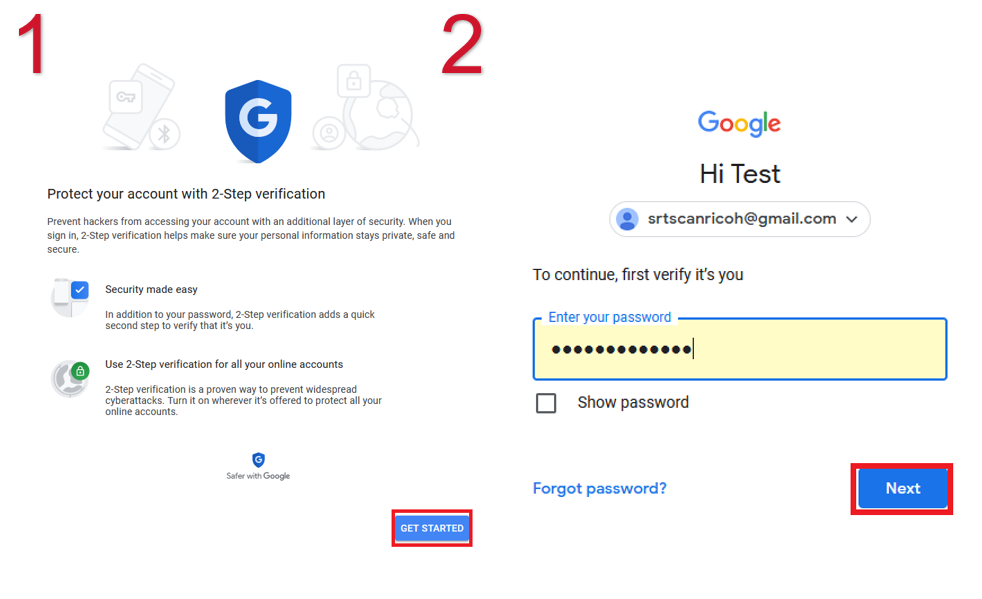
Follow Prompts
1. Select ‘Get Started’
2. Enter your password to verify that it is you;
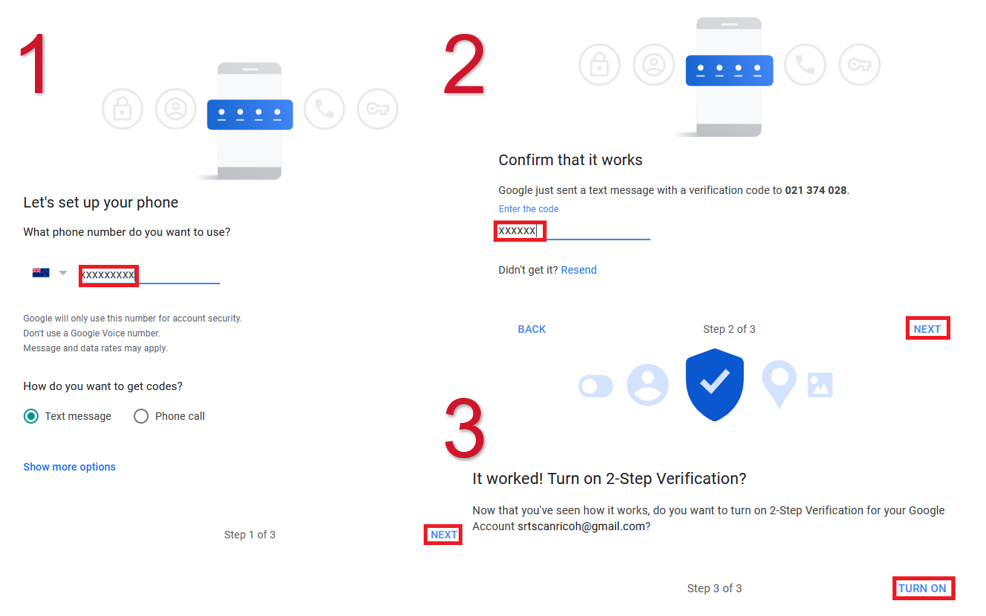
Activate
1. Enter your phone number and select ‘Next’
2. Confirm that it works via a text or phone call verification and select ‘Next’
3. Select ‘Turn On’ at the bottom right corner
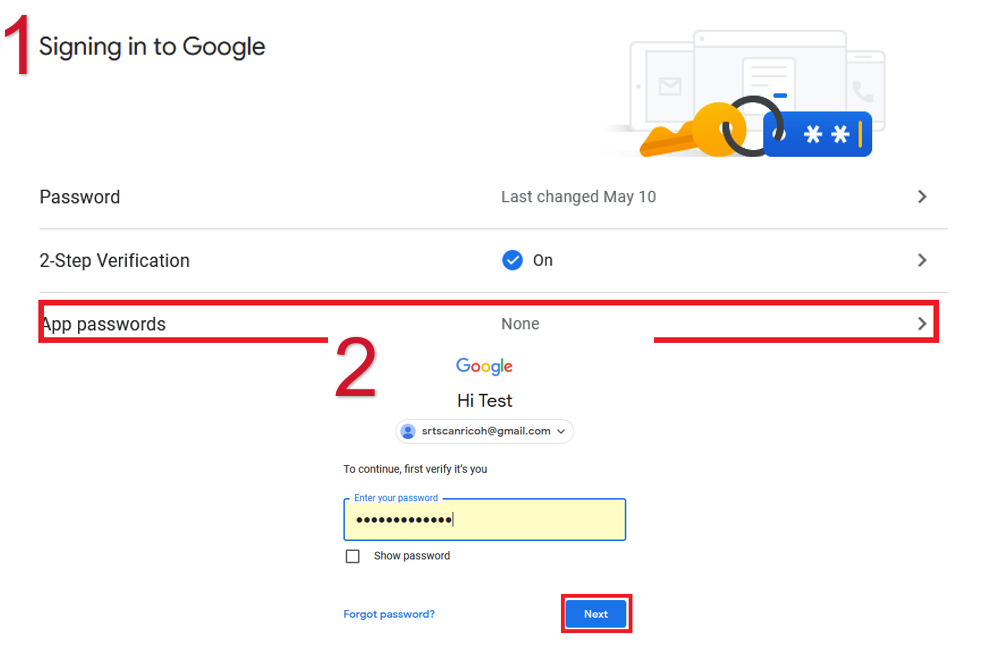
Configure MFD Password
Sign in to your Google account
1. Click on ‘App passwords’
2. Enter your password for verification
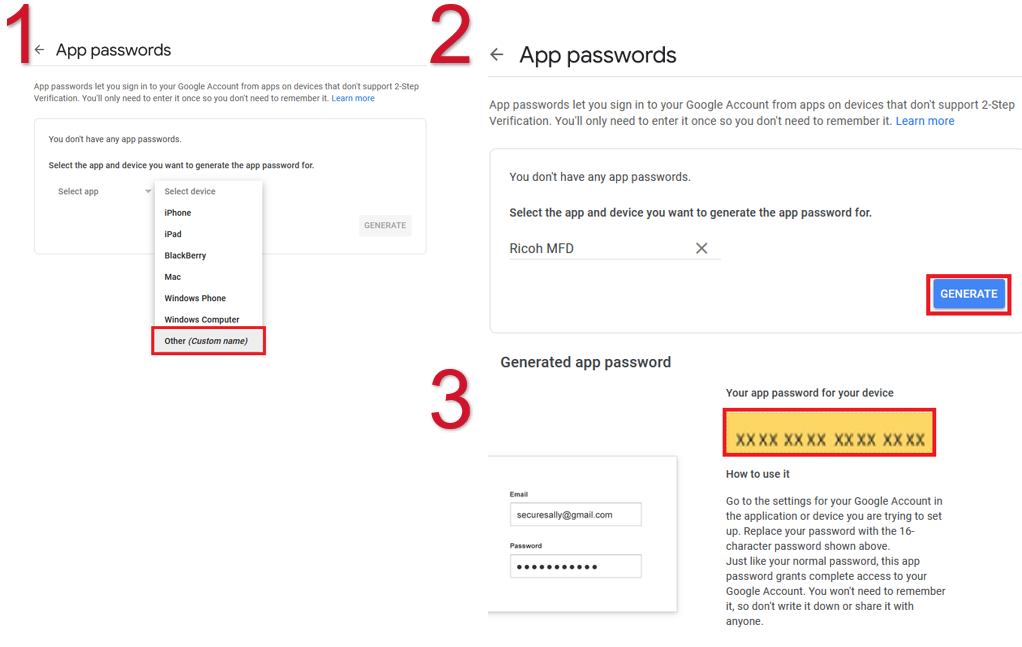
Generate the app password
1. Select ‘Other (Custom name)’
2. Select the app and device you want to generate the app password for and click on ‘Generate’
3. Replace your application/device’s password with the 16-character password shown
img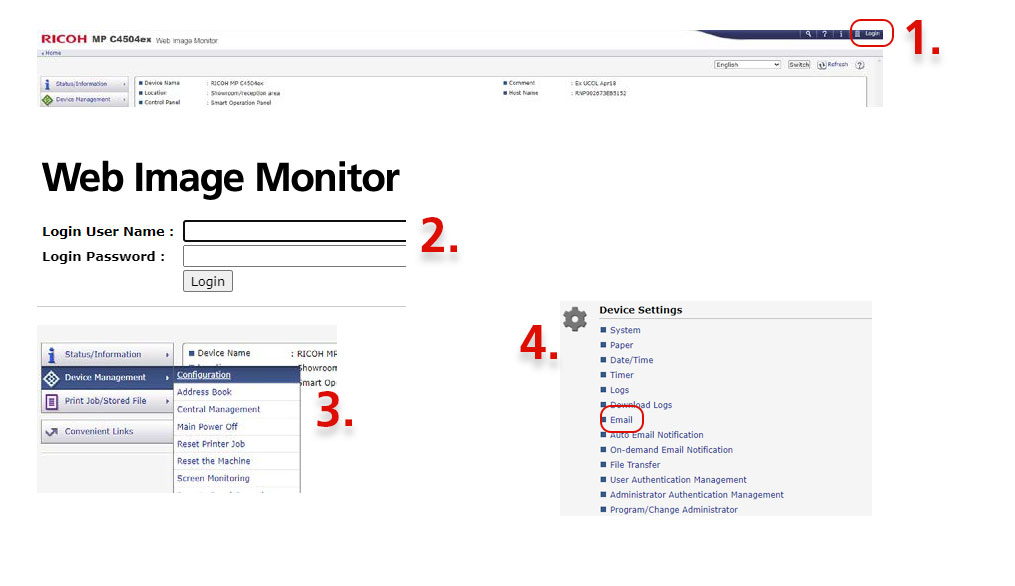

Txt
Update MFD password
Go to Web Image Monitor of Device (IP Address of Device into the address bar of your favourite Browser)
1. IMPORTANT: Log in using the button at the top-right of the screen
2. Enter login details.
3. Select 'Configuration' from Device Management.
4. Select 'Email'
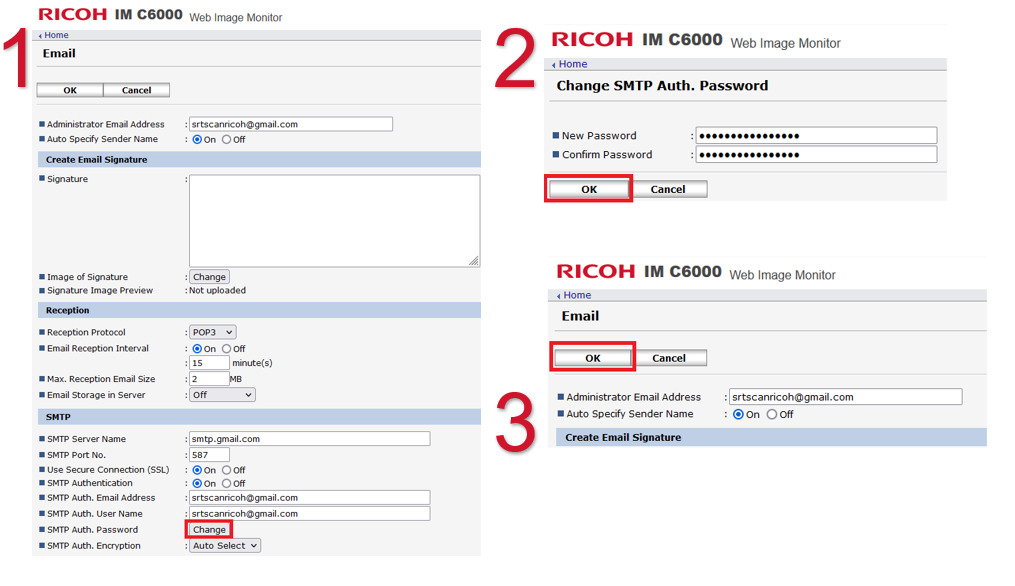
Update MFD password
1. Under the ‘Email’ menu select ‘Change’ that is located next to ‘SMTP Auth. Password’
2. Enter a new password and confirm the password a second time then select ‘OK’
3. Confirm details and select ‘OK’ again
